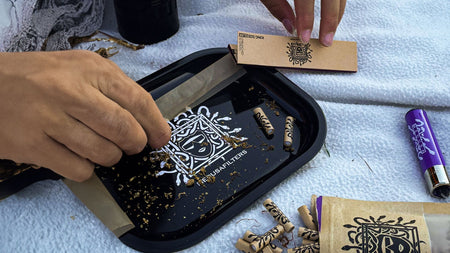


How do you roll a windmill joint?

Willkommen in der Königsdisziplin des Jointbauens. Obwohl der Windmühlenjoint wohl nicht mehr als klassischer Joint zu werten ist, wollten wir ihn dennoch mit aufnehmen, weil man über ihn praktisch nichts weiß und findet. Wer ist der große Unbekannte? Zumindest ist er absolut Chefsache! Mit 4 gleichzeitig brennenden Joints definitiv nichts für Anfänger.
Heute werden wir versuchen, diesem sagenumwobenen Joint ein Denkmal zu errichten und lassen euch an seiner Kunst teilhaben. Das Wort "einfach" müssen wir dabei leider auch aus diesem Blogbeitrag streichen. Es wird herausfordernd und lohnend, ist es erstmal vollbracht.
Was wir brauchen:
⇨ Kartonpapier
⇨ eine Schere oder spitzen Gegenstand
⇨ möglichst neutraler Kleber (Hitzeverträglich)
⇨ Endlesspapes
⇨ 4 dünne, vorgedrehte Joints ohne Tip oder Filter, aber mit Cannabis
⇨ dünne Schnur
Legen wir los! Auf die Anleitung, fertig, los!


Schritt 1: Wir müssen eine Hülse bauen / basteln
In der Hoffnung, eure letzte Art Attack Erfahrung liegt noch nicht zu lange zurück, benötigen wir zuallererst eine eigens angefertigte Hülse aus Kartonpapier. Diese wird zur späteren Basis für eure Windmühle. Verwendet hier ausschließlich dickeres Kartonpapier. Rollt dieses joint ähnlich und konisch, zulaufend zusammen und verklebt die Überlappungen. Lasst alles trocknen.
Übrigens: Bei der Größe der Hülse ist euch freie Hand gelassen, wichtig wird später lediglich sein, dass sie sich noch schließen lässt (typischerweise mit herkömmlichen Kingsize - oder Endlesspapes). Sie sorgt dafür, dass der Rauch schön kühl bleibt - es gilt je größer deine Hülse, desto kühler auch der Rauch.
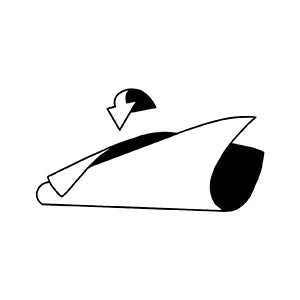
Schritt 2: Die Ummantelung
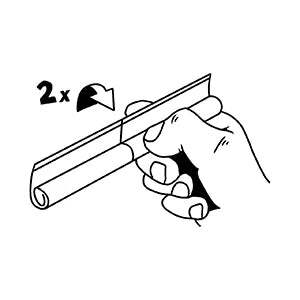
Als Nächstes braucht ihr euer Paper. Dieses wird nun im Bereich der großen Öffnung, mithilfe des Klebestreifens (vorher anfeuchten) einmal drumherum gelegt. Das sollte so geschehen, dass die 50 % mit Klebestreifen an der Hülse und die anderen 50 % des Papes nach oben hin überstehen. Damit soll die Hülse im weiteren Verlauf verschließbar sein. Ihr glaubt, damit das "Schlimmste" überstanden zu haben? Weit gefehlt! Schnell zu Schritt 3, bevor euch die Kräfte verlassen.
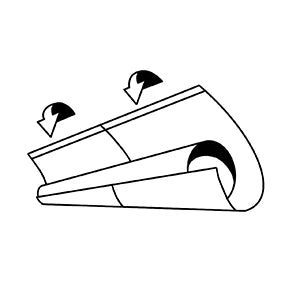
Schritt 3: In jede gute Hülse müssen Löcher
Könnte ein Sprichwort sein, aber wie die Überschrift schon vermuten lässt, geht es eurer Hülse jetzt an den Kragen - Im wahrsten Sinne. Im oberen Drittel brauchen wir jetzt jeweils 2 gegenüberliegende Löcher durch die Hülse. Hierfür könnt ihr entweder die Schere oder doch einen angespitzten Buntstift nehmen. Diesen schiebt ihr einmal komplett durch die Hülse und wiederholt diesen Vorgang, bis ihr 4 parallele Löcher in der Hülse habt. Die Löcher sollten so in etwa die Größe des Durchmessers eurer vorgedrehten Joints haben. Langsam nimmt das ganze doch Formen an.
Schritt 4: Hülsen für die Hülse
Ja, ihr habt richtig gelesen, wir brauchen mehr Hülsen - 2 an der Zahl. Dieses Mal aber in dem Durchmesser eurer Löcher in der Basishülse. Für diese Größe bietet sich oft der Pappdeckel deiner Longpapesverpackung an. Diese neuen, kleineren Hülsen sollten in etwa doppelt so lange wie der Durchmesser der Basishülse an ihrem dicksten Punkt sein. Kompliziert, ich weiß, aber immerhin hast du hier auch was ganz Besonderes vor.
Schneide nun das mittlere Drittel beider kleinen Hülsen bis zur Hälfte raus, sodass diese als "Rotor" aufeinander passen würden.

Schritt 5: Es ist (fast) soweit
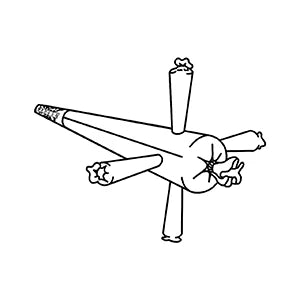
Bald geschafft, versprochen. Schiebe jetzt die beiden kleinen, aufgeschnittenen Hülsen mit ihrer Öffnung (sollte mittig in der großen Hülse liegen) nach unten in die Große. Damit die beiden auch gut ineinander liegen, kannst du von oben nochmals etwas nachhelfen. Was aktuell sehr künstlerisch aussieht, ist schon bald deine fertige Windmühle. Es fehlt nur noch ein letzter Schritt.
Schritt 6: Geschafft - du bist ein wahrer Bastelmeister
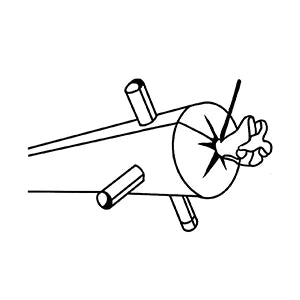
Zu guter Letzt greifst du dir das überschüssige Papier am oberen Ende der großen Hülse und drehst es in der Mitte zusammen. Damit diese auch wirklich dicht bleibt, empfehlen wir noch ein schmales Stück Faden herumzubinden und festzuziehen. Fehlt nur noch ein wichtiges Detail - die Windräder. Stecke also deine 4 vorgebauten Joints in die Aufnahme der nach außen stehenden, dünnen Hülsen. Did it!
Deine Windmühle ist prinzipiell wieder verwendbar. Nach den Mühen hast du dir eine Mehrfachnutzung aber auch zwingend verdient. Einfach neue Joints einstecken und anzünden.
Einen normalen Joint drehen kann jeder - dieses Baby ist was Besonderes. Genieß es!
Häufig gestellte Fragen über den Windmühlen Joint
Ein Windmühlen Joint ist eine besondere Art von Joint, die wegen ihrer Form an eine Windmühle erinnert. Den Windmühlenjoint selber zu bauen ist nicht schwer, man braucht dazu nur die üblichen Utensilien für das Drehen eines Joints – Blättchen, Filter und natürlich das Gras. Dabei muss nur darauf geachtet werden, dass die Blättchen beim Drehen so angeordnet werden, dass sie die Form einer Windmühle ergeben.
Um einen Windmühlen Joint zu bauen, benötigen Sie die gleichen Utensilien wie zum Drehen eines normalen Joints. Das sind im Wesentlichen Blättchen, einen Filter und natürlich das Gras. Zusätzlich brauchen Sie etwas mehr Geduld und Fingerspitzengefühl, um die Windmühle Form zu erreichen.
Die Menge des Grases, die man benötigt, um einen Windmühlen Joint zu drehen, hängt von der Größe ab, die Sie erreichen möchten, und davon, wie fest Sie den Joint drehen. Im Allgemeinen kann man sagen, dass Sie ungefähr die gleiche Menge Gras benötigen wie bei 4 normalen Joints.
Das Drehen eines Windmühlen Joints unterscheidet sich in erster Linie durch die Form, die der Joint am Ende haben soll. Während ein normaler Joint die Form eines Zylinders hat, soll der Windmühlen Joint die Form einer Windmühle haben. Dies erfordert eine etwas andere Technik beim Drehen und ein wenig mehr Geduld.